PanelGetting started
Access tokens
An access token lets kcloud act as you, for example in a CI pipeline or on a server without a browser. A token can do exactly what your account can.
Step 1: Open Access tokens
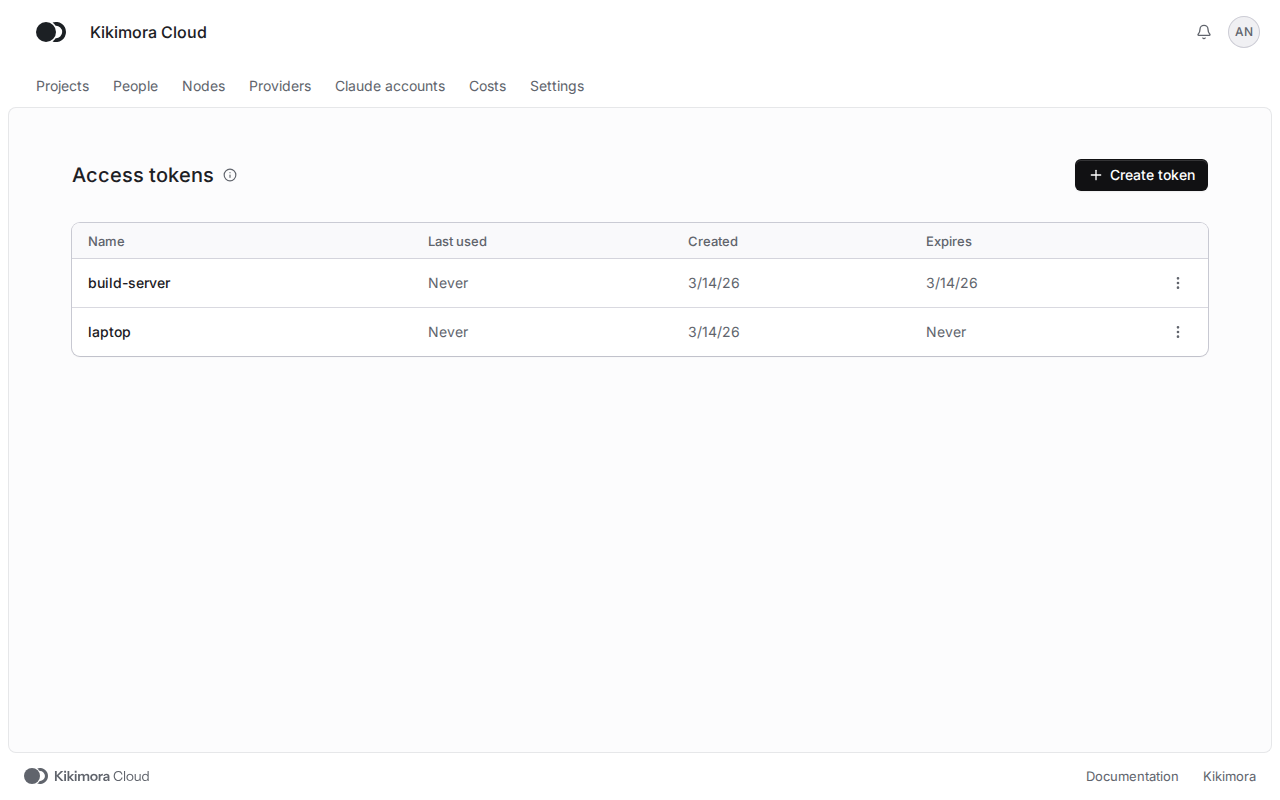
Choose Access tokens in the account menu. The table shows your tokens with the dates of last use, creation and expiry. A token that kcloud login created is listed here too.
Step 2: Create a token
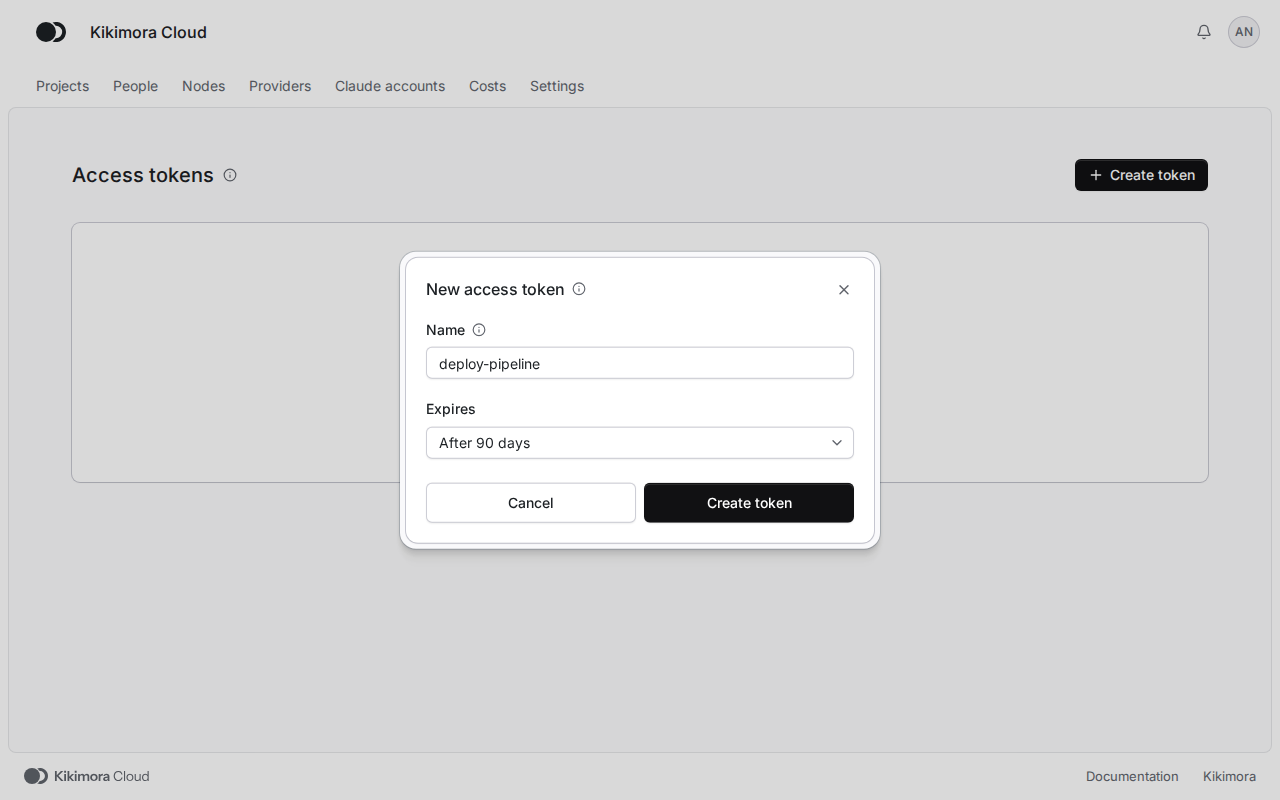
Click Create token. In Name, type what will use it, for example the name of a laptop or of a pipeline. In Expires, pick Never or a number of days, and click Create token.
Step 3: Copy the token
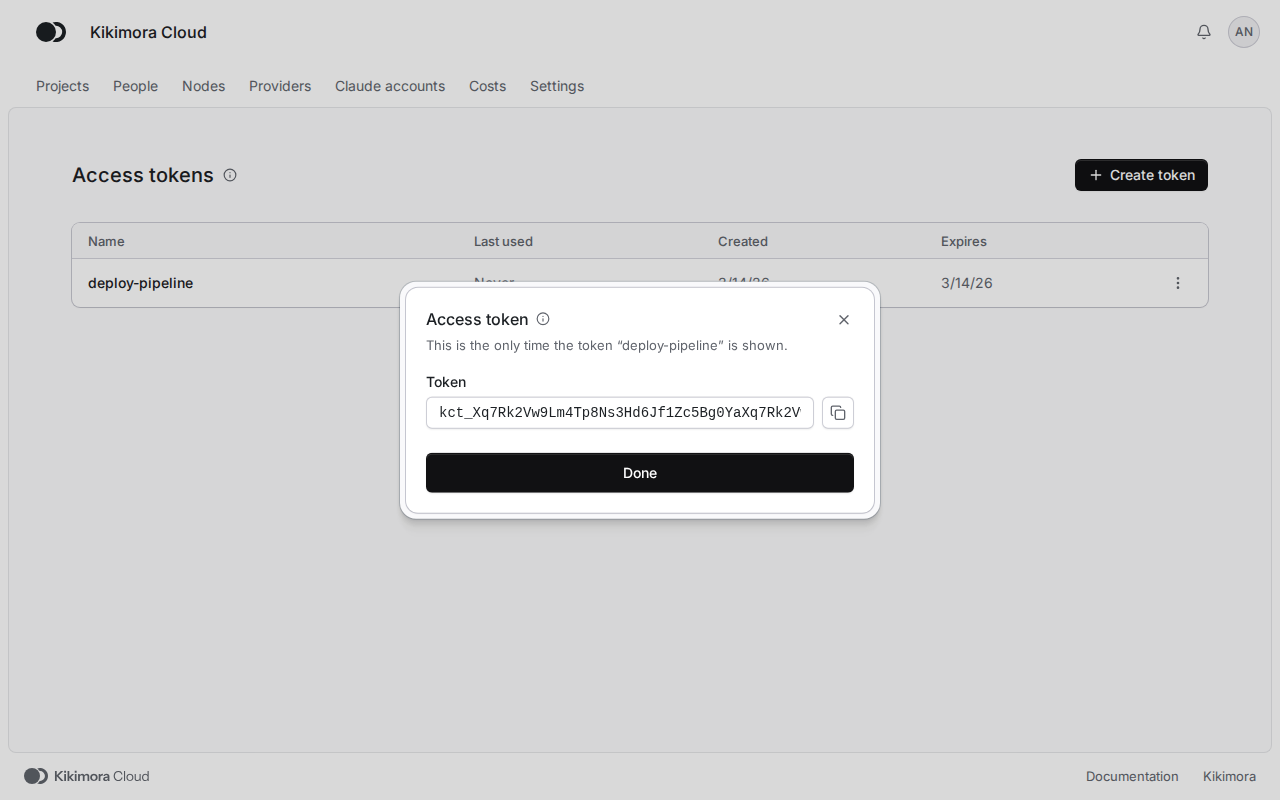
The panel shows the token this one time only. Copy it at once and keep it somewhere safe, such as the secrets of your pipeline. The platform keeps only its hash, so a lost token has to be replaced with a new one.
In a terminal, pass the token on standard input: kcloud login --with-token < token.txt.
Step 4: Revoke a token
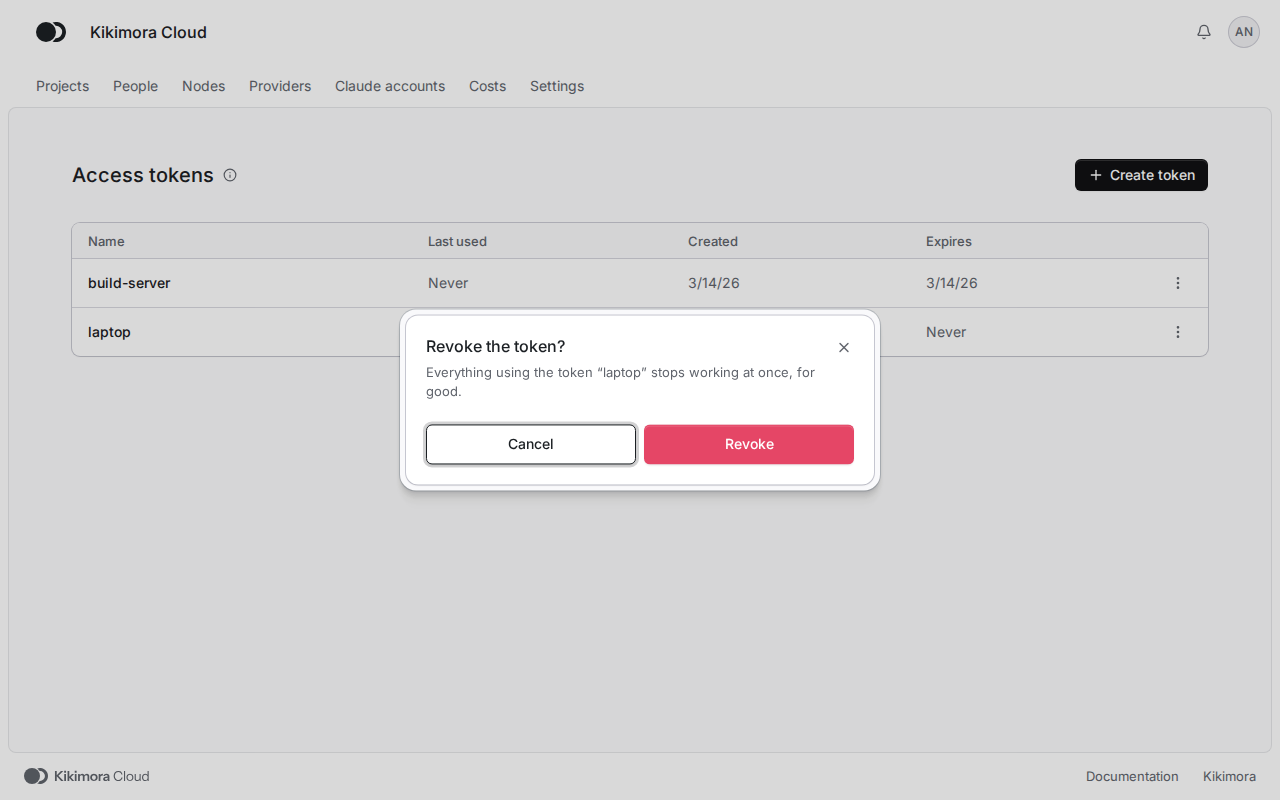
When a token is no longer needed or may have leaked, open the menu of its row, choose Revoke and confirm. Everything that uses it stops working at once.
Matches the panel at cloud.kikimora.dev.